If you’ve ever admired 1950s style, you’ve probably seen the iconic poodle skirt. These fun, flared skirts became a symbol of teenage joy and rock ‘n’ roll culture. Today, many people want to recreate that vintage look. Whether for a costume party, school dance, or themed event, knowing how to make a poodle skirt opens up creative possibilities. The best part is that it doesn’t require advanced sewing skills. With basic materials and clear steps, anyone can complete the project successfully. You choose the fabric, colors, and design to match your personality.
Moreover, making your own poodle skirt lets you customize the fit and details. Unlike store-bought versions, homemade ones reflect your unique taste. You can pick a bold print, add sequins, or sew on a custom appliqué. Children and teens often enjoy wearing them for Halloween or history projects. Adults wear them to retro festivals or 50s-themed diners. Because they’re lightweight and comfortable, poodle skirts suit all-day wear. Therefore, learning how to make a poodle skirt combines fashion, history, and hands-on creativity.
 Introduction to the Iconic Poodle Skirt
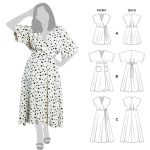
The poodle skirt is a symbol of 1950s fashion. It is known for its wide, swingy circle shape and playful poodle applique. This skirt first became popular in the post-war era. Young women loved its fun design and how it moved when they danced. These skirts often appeared at sock hops and school dances. They are still a classic choice for costume parties and retro events today.
Making a poodle skirt is a great DIY project. It lets you show off your creativity and love for vintage style. You don’t need advanced sewing skills to make one. With some basic materials and simple steps, you can craft a poodle skirt that’s unique to you. In this guide, we’ll show you how to make a poodle skirt. You’ll learn what materials you need and how to put it all together. Whether you’re a sewing newbie or an experienced crafter, this project is fun and rewarding. So, let’s dive into the world of 50s fashion and learn how to make a poodle skirt!
Essential Materials for Your Poodle Skirt
To start your DIY poodle skirt, gather the right materials. Here’s what you’ll need:
- Felt fabric: Choose a vibrant color. You’ll need about 1.5 to 2 yards for a child and more for an adult.
- Elastic: Get enough to fit snugly around the waist.
- Fabric glue: This will secure the applique without sewing.
- Black and other colored felt: For the poodle and other decorative elements.
- Ribbon or ric rac: To create the poodle’s leash.
- Scissors: For cutting fabric to shape.
- Measuring tape: To get the right fit.
- Chalk or a fabric pen: To mark where to cut.
- Paper for patterning: For sketching your poodle shape.
When you have these items ready, you can make the skirt easily. You will cut, glue, and assemble the skirt with these materials. The process is straightforward, even for beginners.
Remember to choose materials that will bring out the best in your poodle skirt. Bright colors and sturdy fabric make the skirt stand out. Good quality glue ensures the applique stays in place. With the right materials, your skirt will look great and last long.
 Measuring for the Perfect Fit
To guarantee your poodle skirt swings just right, accurate measurements are key. Begin by
taking the waist measurement. Wrap the measuring tape around the waist where the skirt
will sit. Make sure it’s snug but not too tight for comfort. Note down this first number.
Next, measure the length. Decide how long you want your skirt. A typical poodle skirt falls
midi-length, just below the knee. Measure from the waist down to where you want the skirt
to end. Jot down the length. Now, it’s time for some simple math. To calculate the radius
for your skirt’s waist opening, subtract about 2 inches from your waist measurement.
Divide this new circumference by 6.28 (which is twice Pi). This gives you the radius, which
helps in cutting a perfect waist circle. Keep these numbers handy; they’re vital for the
next steps of your DIY poodle skirt project.
Cutting the Fabric: A Step-by-Step Guide
To create your poodle skirt, follow this simple guide to cut the fabric accurately.
Step 1: Prepare Your Work Area
Lay your felt fabric flat on a large work surface. Make sure there are no creases or wrinkles.
Step 2: Fold and Mark
Fold the fabric so it’s in four layers. Then, using chalk or a fabric pen, mark the radius point at the fold. This helps you cut a perfect waist circle.
Step 3: Cutting the Waist Circle
Measure the radius from the center fold, marking it around in an arc. Cut out the small waist circle with sharp scissors for a neat edge.
Step 4: Determining the Skirt Length
From the edge of the waist circle, measure down to the desired skirt length. Mark this distance in a larger arc to create the bottom of your skirt.
Step 5: Cutting the Skirt’s Hem
Now, cut along the larger arc. Keep your hand steady and follow the marks to ensure an even hemline.
Step 6: Unfold and Refine
Carefully unfold your fabric. Trim any uneven edges for a clean, smooth hem.
By following these steps, you’ll have the base of your poodle skirt cut and ready to assemble. Make sure to follow the radius and length measurements closely for how to make a poodle skirt that has the classic 50s flair.
 Assembling the Skirt Without a Sewing Machine
After cutting your fabric, the next step is to assemble your skirt. Don’t fret if you don’t have a sewing machine. You can still create a poodle skirt with a few tricks. Follow these steps for an easy assembly:
Step 1: Attaching the Elastic Waistband
Wrap the elastic around the waist to ensure a snug fit. Mark the point where it feels comfortable but secure. This is where you’ll join the ends. Apply fabric glue generously to the ends of the elastic. Press and hold them together until the glue sets. Make sure the bond is strong.
Step 2: Connect the Waistband to the Skirt
Once the waistband is ready, align the waist circle of the fabric over the elastic. Use small dabs of fabric glue to stick the felt to the elastic. Work your way around the waist, gluing inch by inch. Allow the glue to dry before moving to the next step.
Step 3: Adding the Poodle Leash
Cut a piece of ribbon or ric rac to create the leash. Starting from the waist, glue it diagonally across the skirt. Apply the glue to the underside of the ribbon. Press down firmly to secure it.
By following these steps, you can assemble a charming poodle skirt without any sewing involved. The key is to use strong fabric glue and allow it to dry fully in each step. If you prefer, hand-stitching is also an option when attaching the waistband and leash. However, for those seeking a no-sew project, the glue method works perfectly. Now, your skirt is ready for the fun part—adding the poodle applique and embellishments!
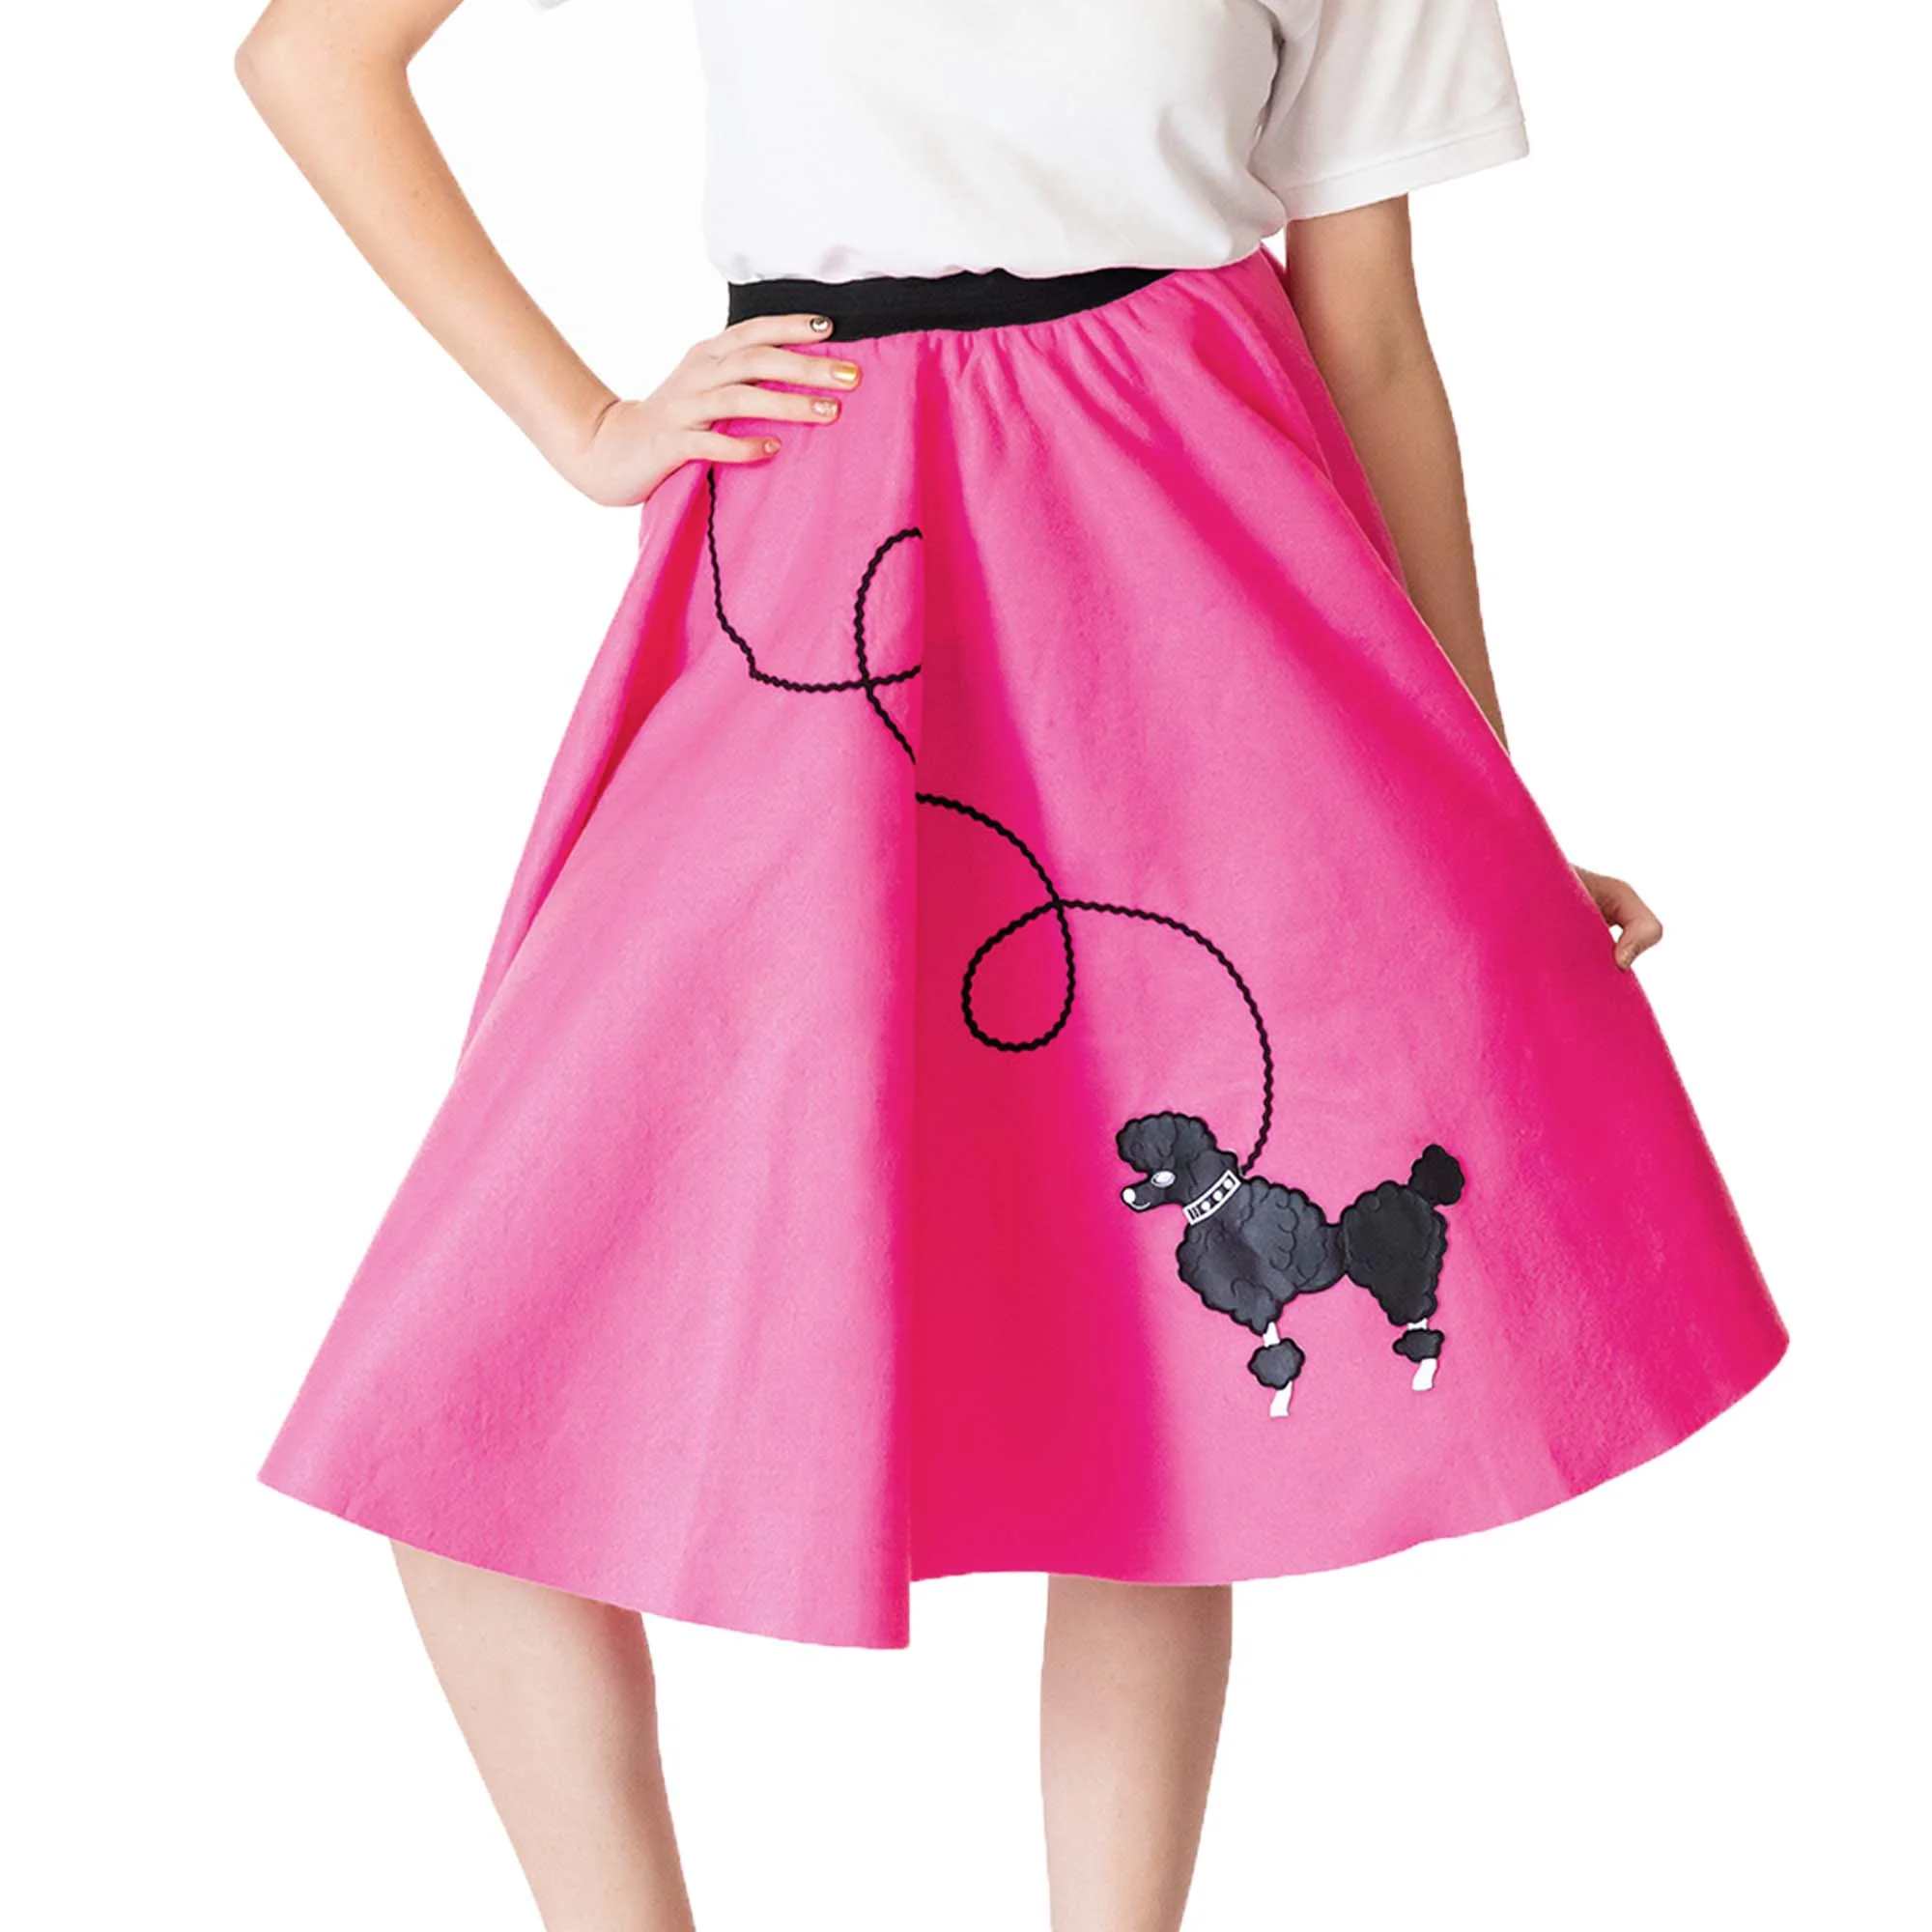
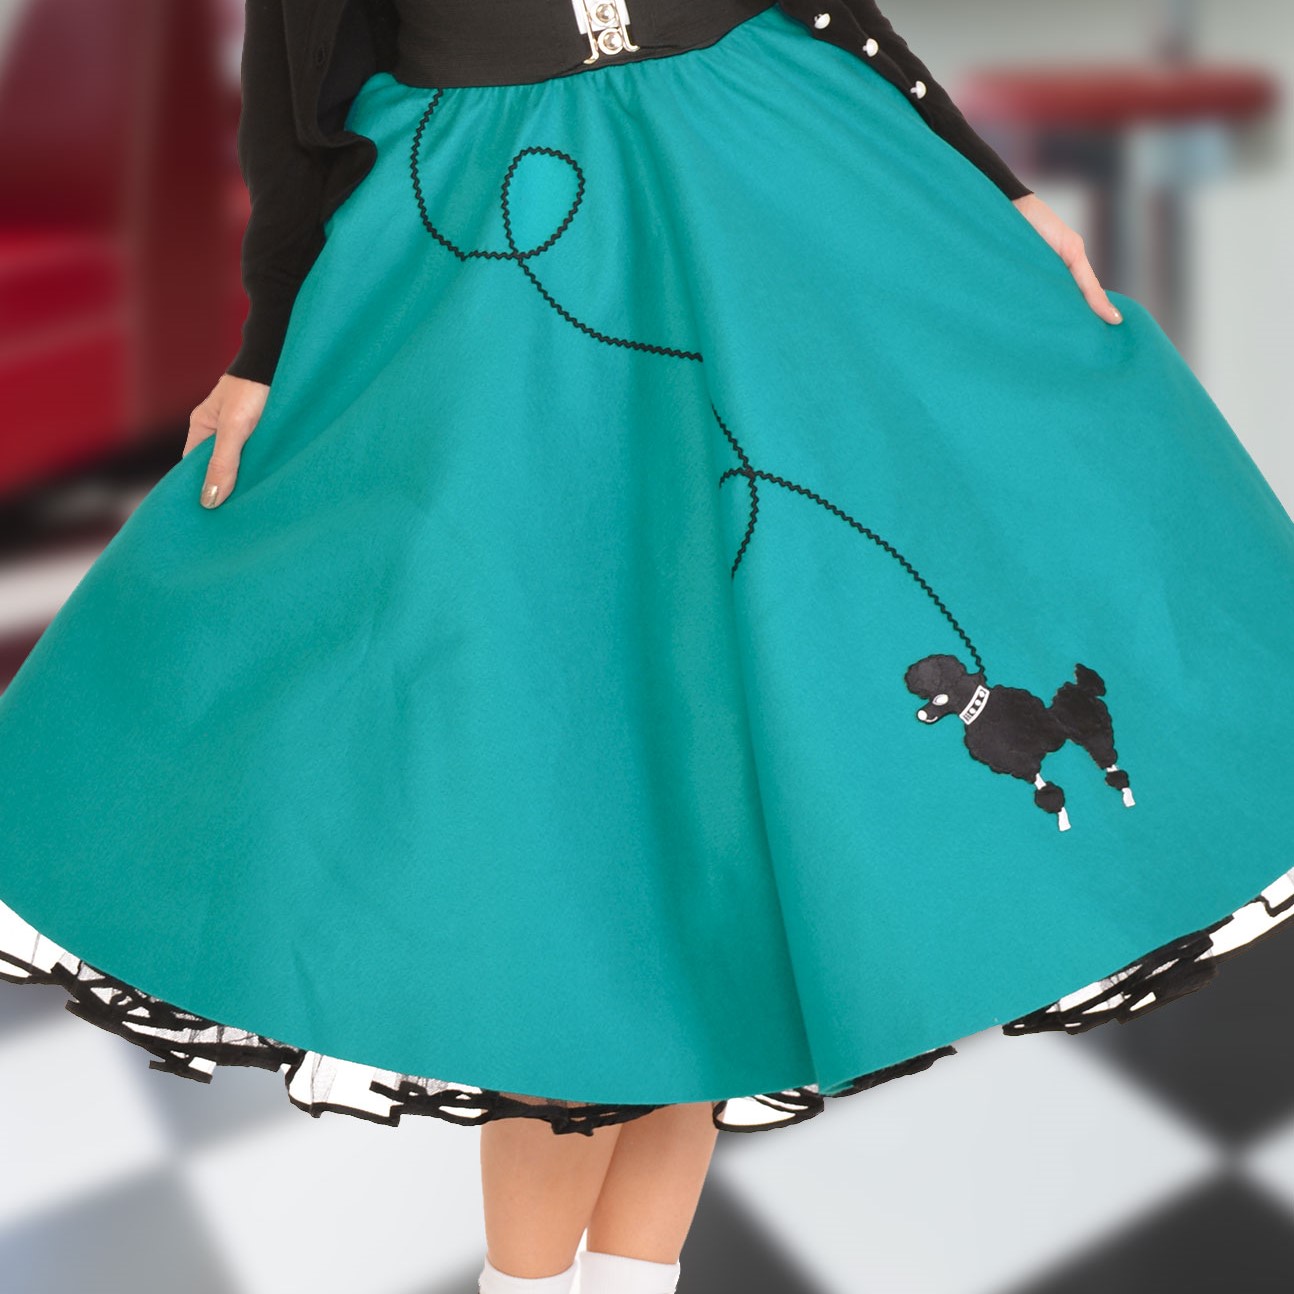
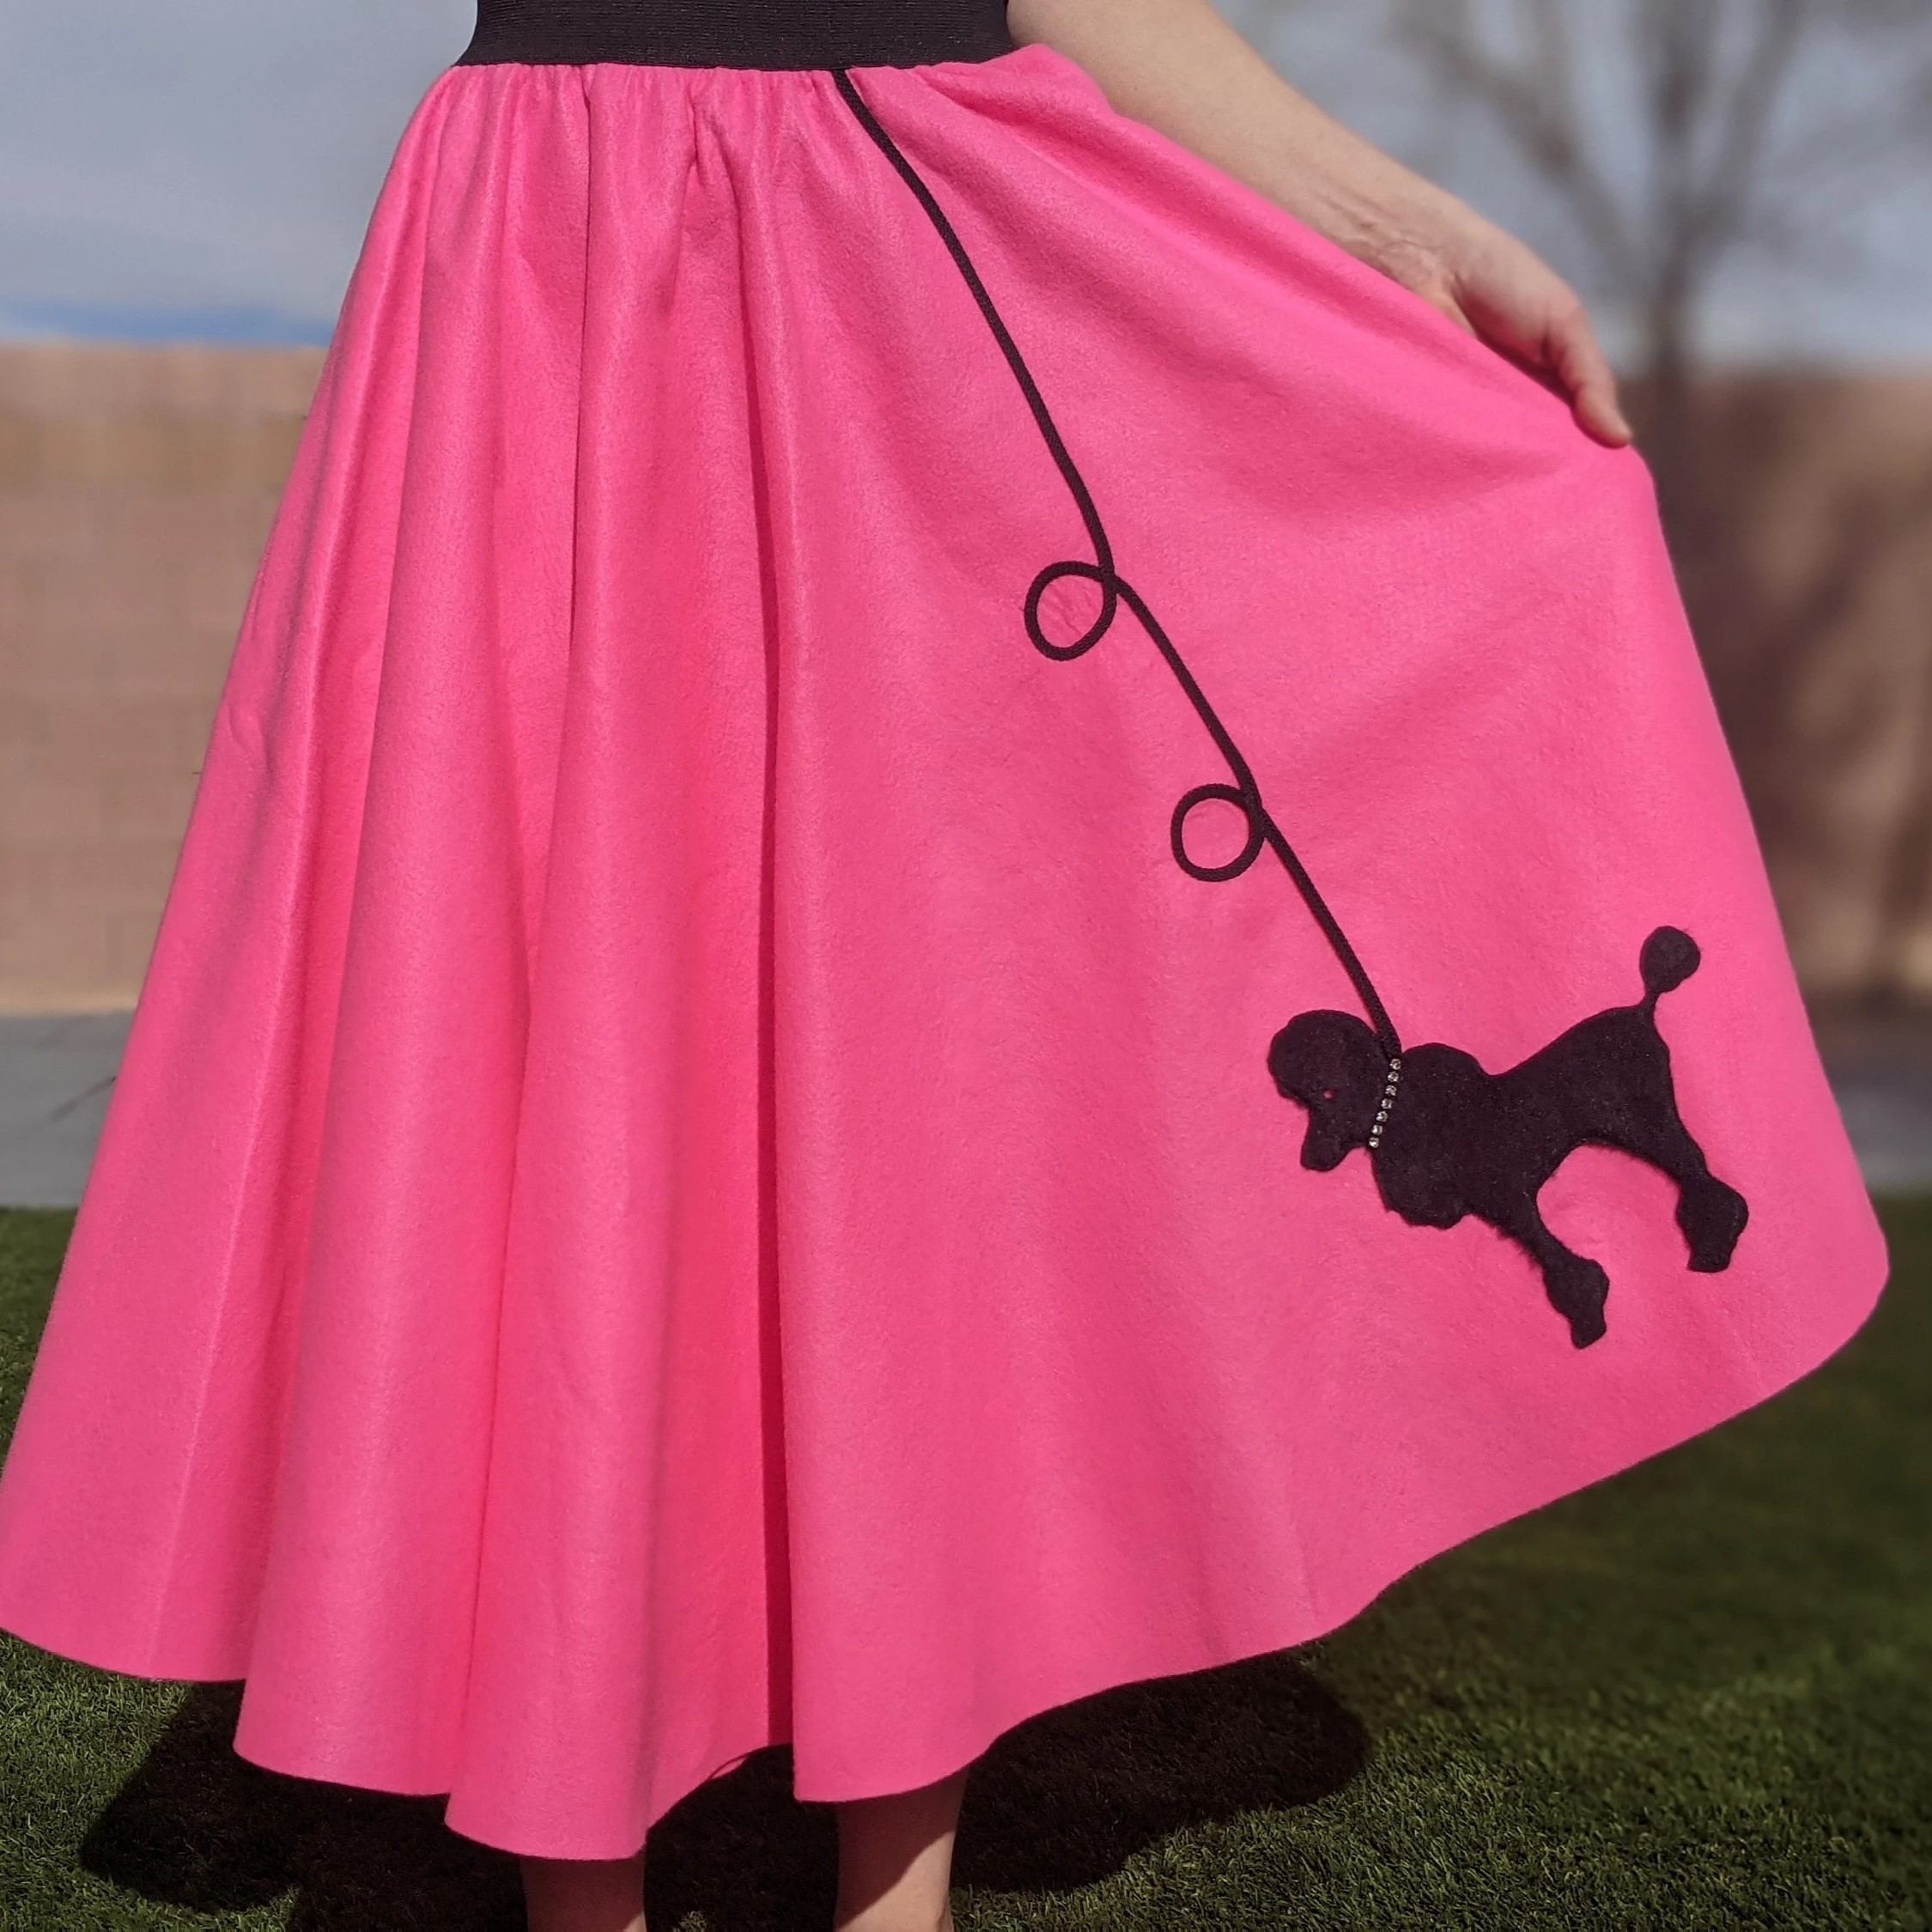
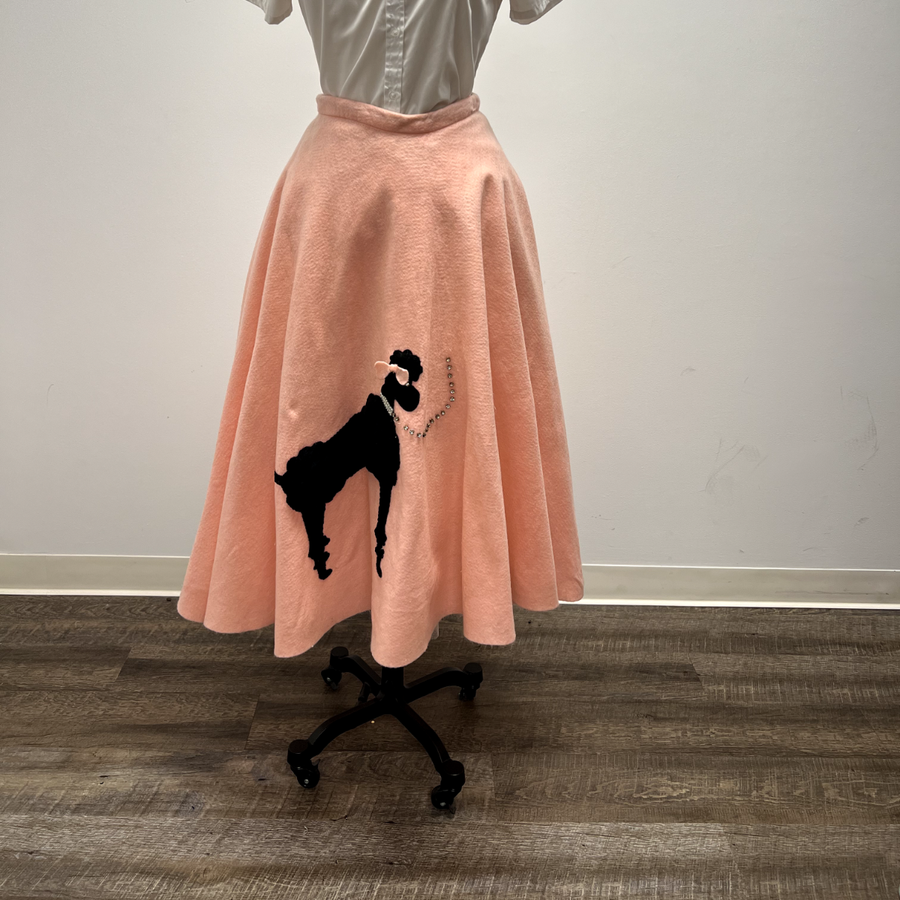
Adding the Poodle Appliques and Embellishments
Now it’s time to bring your skirt to life with a poodle applique and embellishments. Here’s how you can do it:
Step 1: Preparing the Poodle Applique
First, choose a poodle shape. Sketch or print a design on paper. Then, transfer the outline onto black felt using chalk or a fabric pen. Cut out the poodle with sharp scissors for clean edges.
Step 2: Creating Embellishments
Use colored felt to craft a collar, leash, and other accessories for your poodle. You could cut small pieces for the eyes, nose, and a cute bow.
Step 3: Arranging the Applique
Lay the skirt flat and decide where to place your poodle. The typical spot is near the hem, off to one side. Arrange the cutouts on the skirt. When satisfied, glue each piece into place.
Step 4: Attaching the Leash
Glue a piece of ribbon or ric rac from the poodle’s neck up to the skirt’s waistband. This creates the effect of a leash. Ensure the line is playful and curved like a real leash.
Step 5: Adding Final Touches
You can add extra details like sequins or beads for a collar. This gives your skirt an authentic ’50s look. Let all the glued parts dry completely.
By completing these steps, your poodle skirt will now have its signature look. Remember to tailor the embellishments to your style. Use strong glue for a lasting effect. Now you’re ready to twirl in true retro fashion.
Finishing Touches for Your Poodle Skirt
Once you have assembled your skirt and applied the poodle applique, it’s time for the finishing touches. These details will add charm and authenticity to your vintage creation. Here’s how to add those final flourishes:
Step 1: Add a Waistband Cover
To give the waistband a neat appearance, cut a strip of felt wide enough to cover the elastic. Apply fabric glue along the edges of the strip and press it onto the waistband. This hides the elastic and adds a cohesive look to the skirt.
Step 2: Decorate with Sequins or Beads
For some sparkle, decorate the poodle’s collar or leash with sequins or beads. Apply glue to the back of each sequin and place it on the skirt. Be creative with colors and patterns.
Step 3: Create a Matching Scarf
Cut a long strip of felt or another complementary fabric for a neck scarf. Tie it loosely around your neck or drape it stylishly over one shoulder. This accessory completes the 50s outfit.
Step 4: Press the Skirt for a Smooth Finish
Lastly, use a warm iron to gently press the skirt. Lay a cloth over the felt to protect it from direct heat. Pressing will smooth out any wrinkles and give your skirt a polished look.
By following these steps for how to make a poodle skirt, you’ll ensure your skirt is ready for its debut. Whether for a costume party or a dance, you’ll rock the iconic 50s style with confidence. Now, grab your dancing shoes and enjoy the fun of your DIY poodle skirt!
 Tips and Tricks for Poodle Skirt Success
Creating the perfect poodle skirt involves more than just following the steps. To ensure your DIY poodle skirt is a hit, here are some simple tips and tricks:
Choose the Right Felt
Not all felt is created equal. Pick a high-quality, sturdy felt that won’t sag or tear easily. This will keep your skirt looking great all day or night.
Pay Attention to Detail
When adding the poodle and leash, use clear-drying fabric glue. It hides any mistakes and gives a clean finish. Cut embellishments carefully to avoid fraying edges.
Keep It Comfortable
Make sure the elastic waistband fits snugly but comfortably. A well-fitting skirt will look better and let you move freely.
Lay It Flat to Dry
After gluing, lay the skirt flat to dry completely. This helps avoid any puckering or bumps in the fabric.
Adjust Length for Style
For different looks, adjust the skirt’s length. Shorter lengths work well for a fun and flirty style, while longer lengths suit a classic look.
Accessorize Smartly
Pair your skirt with a light scarf, bobby socks, and saddle shoes for a full 50s feel. These accessories complete the ensemble.
By keeping these tips in mind, you’ll have a stunning poodle skirt that turns heads. The little details can make a big difference, so take your time and enjoy the process of creating your own piece of retro fashion magic.
Frequently Asked Questions About Making Poodle Skirts
Common Concerns Answered Clearly
Do I need a sewing machine? No, hand-sewing works but takes longer. Can kids make one safely? Yes, with adult help for cutting and sewing. Is felt the only fabric option? No, cotton, denim, or satin also work.
How long does it take? Most finish in 3–5 hours. Can I wash it? Yes, hand wash or gentle machine cycle. Avoid drying in direct sunlight. Will the appliqué stay on? If glued and sewn, yes. Do I have to use a poodle? No, use any design you like.
Can I make it without a waistband? Not recommended—it helps hold shape. What if I cut the circle wrong? Trim carefully or start over with new fabric. Can I add a zipper? Yes, insert it in the side seam. These answers help users avoid common mistakes. They build confidence for first-time crafters.
 Final Thoughts
Why Learning How to Make a Poodle Skirt Is Worth It
Making a poodle skirt is more than just a craft—it’s a journey into fashion history. You connect with the past while expressing your style. The process teaches measuring, cutting, and sewing basics. These skills apply to other DIY projects too. Whether for fun or function, the result is rewarding.
It also encourages sustainability. Instead of buying new, you create something unique. Repurpose old fabric or thrift materials. This reduces waste and supports eco-friendly habits. Gifting a handmade skirt shows thought and effort.
Owning a custom poodle skirt boosts confidence. You know exactly how it was made. It fits your body and matches your taste. No two are exactly alike. Therefore, each one becomes a personal treasure.
Ultimately, knowing how to make a poodle skirt empowers you to recreate vintage charm. It blends creativity, culture, and craftsmanship in one wearable piece. So gather your tools and start sewing—your retro masterpiece awaits.