Introduction to Magic Wrap Skirts
Magic wrap skirt pattern! Magic wrap skirts dazzle with versatility and style. A single skirt can transform into multiple looks, making it a staple for any DIY fashion enthusiast. These skirts wrap around the body and tie at the waist or hip, suiting various sizes with ease. Whether you’re a seasoned seamstress or new to sewing, creating a magic wrap skirt pattern is a rewarding project.

Crafting your own magic wrap skirt opens up a world of creativity. Choose fabrics that reflect your personality, from bold prints to tranquil pastels. Not only will you have a unique piece in your wardrobe, but you’ll also gain the satisfaction of saying, ‘I made this!’ As we delve into the process, you’ll learn the basics and the little details that make your skirt truly ‘magic’.
Ready to embark on this DIY journey? Grab your materials, and let’s get started on crafting a wrap skirt that’s as unique as you are. With this guide, you’ll learn how to measure, cut, and sew a magic wrap skirt pattern that can be the highlight of any outfit. Stay tuned as we take you through each step, ensuring you create a skirt that’s both beautiful and personal.
Essential Materials for Crafting a Magic Wrap Skirt
Gathering the right materials is key to a successful magic wrap skirt project. To start, you’ll need quality fabric. The amount depends on your size and the skirt length you desire. A light to medium-weight fabric like cotton or silk is ideal. You’ll also want a coordinating thread that matches your fabric.

For the base of the skirt, you’ll require about 3 to 4 yards of fabric. Ensure it’s wide enough to wrap around your body comfortably. If you want a reversible skirt, pick two types of fabric. Remember, you need double the amount for two layers.
You’ll need a measuring tape for accurate sizing. A pair of sharp fabric scissors makes cutting clean lines easier. For marking the fabric, tailor’s chalk or a fabric marker will come in handy. You’ll also need a straight edge or a ruler to guide your cuts. A sewing machine is essential for a sturdy and professional finish, but you can also hand-sew if preferred.
Don’t forget about the closure! You can use ties made from the same fabric or opt for snap buttons or Velcro for a seamless look. Lastly, get some pins to hold the fabric in place as you sew.
That’s your essential material checklist. With these items, you’re ready to move on to making your own magic wrap skirt pattern.
Step-by-Step Guide to Making a Magic Wrap Skirt
Creating your own magic wrap skirt pattern is easier than you might think. Follow these steps, and you’ll have a beautiful piece to show off in no time.
Choose Your Fabric
Start by selecting a fabric that speaks to your sense of style. Keep it light to medium weight for the best flow. Cotton or silk are excellent choices. Aim for about 3 to 4 yards depending on the desired length of your skirt. For a reversible skirt, pick two different fabrics.
Measure and Cut the Fabric
First, measure your waist and decide on the skirt length. Lay the fabric flat and use a straight edge and tailor’s chalk to mark your measurements. Cut carefully along the lines with your sharp scissors.
Sew the Edges
Fold over the edges of the fabric about a quarter-inch, pin them down, and sew. This creates a clean hem. If you’re making a reversible skirt, place the second fabric on top, align, and sew the edges together.
Add the Waistband
Cut a strip of fabric for the waistband. It should be long enough to wrap around your waist and tie securely. Sew this onto the top edge of your skirt.
Attach the Closure
You can add ties by sewing strips of fabric to the ends of the waistband. For snap buttons or Velcro, sew them in strategically so the skirt fits comfortably.
Final Touches
Give your skirt a final ironing. This helps to get rid of any wrinkles and gives the skirt a tidy finish. Now, step back and admire your handiwork. Your custom magic wrap skirt pattern is ready to wear!
Following these steps ensures that you create a magic wrap skirt fitting your taste and personality. With just a little patience and creativity, you can make a stylish garment that’s truly your own. In the next sections, we’ll explore variations and how to add personal touches to your design.
Variations on the Basic Magic Wrap Skirt Design
When you master the magic wrap skirt pattern, the fun begins with customizing. This section explores ways to refresh the basic design. Mix and match these ideas to create multiple unique skirts from one pattern.
Vary the Length
Experiment with the length of your magic wrap skirt. Try a miniskirt for a playful look, or go elegant with a floor-length version. Medium-length offers versatility, perfect for different occasions.
Experiment with Layers
Introduce layers to your skirt for extra flair. Use sheer fabric as an overlay, or add ruffles at the hem. This adds dimension and movement to your magic wrap skirt.
Adding a High-Low Hem
A high-low hem gives a trendy twist. The front hem should be shorter than the back, giving a stylish asymmetrical look. This design is great for showcasing your shoes.
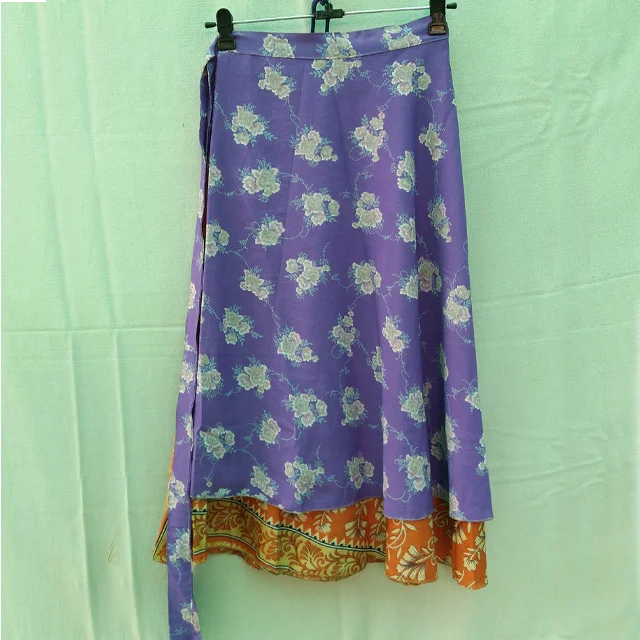
Reversible Skirts
Make your skirt double-sided for more options. Choose two contrasting fabrics. With a reversible skirt, you’ll have two looks in one, extending your wardrobe.
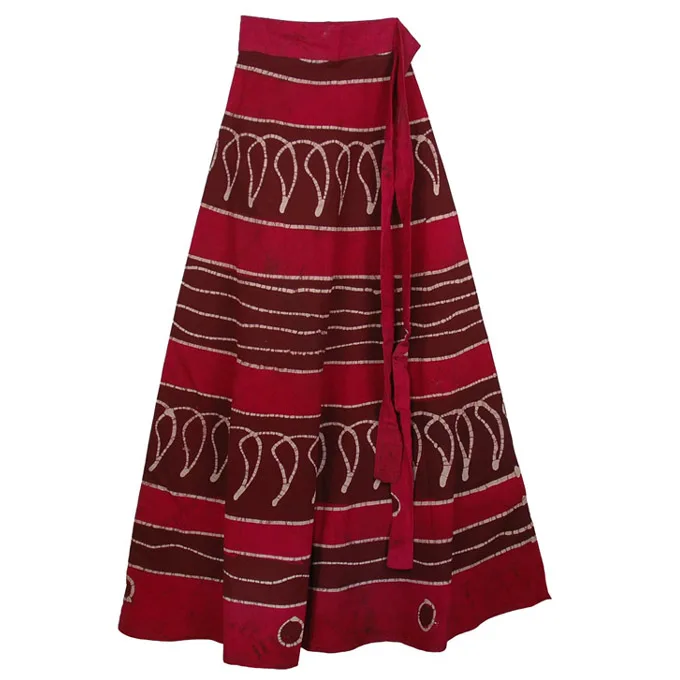
Prints and Patterns
Go bold with vivid prints or choose subtle patterns to suit your style. Patterns can transform the look of your skirt, offering endless possibilities for personalization.
Incorporating Pleats or Slits
Pleats can add sophistication, while slits introduce a modern edge. Include these elements to enhance the texture and shape of your skirt.
By exploring these variations, you can turn a simple magic wrap skirt pattern into a myriad of fashionable pieces. Remember, the key is to make it your own, so unleash your creativity and have fun with the design. Next, we’ll look into adding personal touches and embellishments to further personalize your magic wrap skirt.
Adding Personal Touches and Embellishments
After mastering the basic magic wrap skirt pattern, it’s time to infuse it with your unique touches. Personalizing your skirt sets it apart, making it a one-of-a-kind item in your closet. Here’s how you can add that special flair to your DIY project:
Add Colorful Embroidery
Embroidery can bring a vibrant touch to your skirt. Choose threads that contrast or complement your fabric. You can embroider along the hem or create patterns across the skirt.
Incorporate Beads and Sequins
For a bit of sparkle, sew on some beads or sequins. You can make patterns or scatter them randomly. They catch the light beautifully and can elevate a simple skirt.
Attach Lace or Trim
Adding lace or trim along the edge adds elegance. You can find many styles, from vintage to modern. Choose a trim that matches the style you’re going for.
Iron-On Patches or Appliqués
Patches or appliqués are great for a quick and effective transformation. Iron them on for an instant update. There’s a vast range to pick from, be it floral or abstract.
Use Fabric Paints
Unleash your inner artist with fabric paints. Stencils can help create neat designs, or you can freehand for a more organic feel. Just let the paint dry completely before wearing.
Create a Belt or Sash
To define your waist, make a belt or sash from the same or contrasting fabric. This also helps in giving the skirt a different shape and style when tied uniquely.
With these embellishments, your magic wrap skirt pattern will become more than just a garment; it’ll be a statement of your personality. Experiment with these ideas, and remember that sometimes, less is more. Keep trying different touches until your skirt feels just right.
Tips for Accurate Measuring and Cutting
When creating your magic wrap skirt pattern, precise measuring and cutting are crucial for a perfect fit. Here, we provide some tips to help you achieve accuracy. This guide simplifies the process, ensuring your DIY project turns out just right. Pay close attention to these suggestions for the best results.
Use a Reliable Measuring Tape
Choose a flexible measuring tape for your body measurements. Make sure it lays flat against your skin or clothing without twisting.
Double-Check Measurements
Always measure twice before cutting. This ensures you catch any mistakes and avoid wasting fabric.
Mark Fabric Clearly
Use tailor’s chalk or a fabric marker to mark your measurements on the fabric. Ensure these marks are visible but not permanent.
Cut on a Flat Surface
Spread your fabric on a large, flat table or floor. This helps in keeping the fabric stable and ensures straighter cuts.
Keep Scissors Sharp
Sharp scissors make for clean and effortless cuts. It’s worth investing in good quality fabric scissors.
Follow the ‘Measure Twice, Cut Once’ Rule
This old saying is key to successful DIY sewing projects. Patience here can save you from errors later on.
Don’t Rush
Take your time with measuring and cutting. Rushing can lead to uneven hems and a poor fit.
By following these tips, you can ensure that your magic wrap skirt pattern is measured and cut with precision. Accurate measuring and cutting are the foundations for a skirt that fits well and looks great. In the next sections, we’ll explore how to sew your pieces together for a professional finish, so stay tuned!
Sewing Techniques for a Professional Finish
Achieving a professional finish in sewing your magic wrap skirt pattern is essential for its durability and look. Here are helpful techniques to elevate your sewing skills.
Choose the Right Needle
Select a needle that suits the fabric weight. A fine needle for delicate fabrics, and a stronger one for heavier materials.
Sew Straight
For straight seams, use a guide on your sewing machine. It will help you sew in a straight line.
Consistent Seam Allowances
Keep your seam allowances even. This ensures the pieces fit together well when sewing.
Backstitch at Start and End
Always backstitch when you start and finish sewing. This locks the stitches in place.
Press as You Go
Iron seams flat as you work. This keeps the fabric smooth and easier to handle.
Trim and Finish Seams
Trim excess fabric from seams and use a zigzag stitch or a serger to prevent fraying.
Test on Scrap Fabric
Before sewing on your skirt, test the stitch and tension on a scrap of the same fabric.
Patience is Key
Take your time with each step. Rushing can lead to mistakes and a less polished finish.
These sewing techniques will help ensure your magic wrap skirt pattern looks as great as it feels. With care and attention to detail, you’ll create a skirt that’s not only fashionable but also boasts a professional quality. Happy sewing!
Styling Your DIY Magic Wrap Skirt
Now that your magic wrap skirt pattern is ready, it’s time to style it! Here are easy ways to make sure your skirt looks great, no matter the occasion.
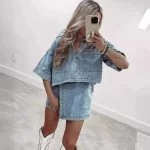
Choose the Right Top
Pick tops that balance the skirt’s flow. A fitted top or a tuck-in blouse works best. Avoid bulky layers that can add unwanted volume around your waist.
Select Suitable Footwear
Footwear can change the vibe of your outfit. Pair sandals or flats for a casual look. Heels add elegance, perfect for dressier events.
Accessorize Smartly
Add simple jewelry like bracelets or earrings. Belts or sashes can accentuate your waist. Remember, less is more – don’t overdo it.
Play with Colors
Match your top with the colors in your skirt. Use bold colors for a statement, or soft shades for a subtle look. Contrast or complement – both work!
Experiment with Layers
Layer with cardigans, blazers, or jackets. This adds texture and interest. Make sure they don’t hide the skirt’s features.
Following these styling tips will ensure your DIY magic wrap skirt stands out. Just like making it, styling is also about expressing yourself. Have fun mixing and matching, and enjoy the versatility of your new fashion creation!